An Abrasive Wear Testing Machine is a precision testing instrument specifically designed to simulate and evaluate the wear resistance of materials under abrasive conditions. As an important tool in tribology research, it uses controlled test conditions to quantitatively measure the wear loss and coefficient of friction of metallic materials, non-metallic materials, coatings, and composite materials under dry sand or slurry conditions, providing critical data support for material development, quality control, and failure analysis.
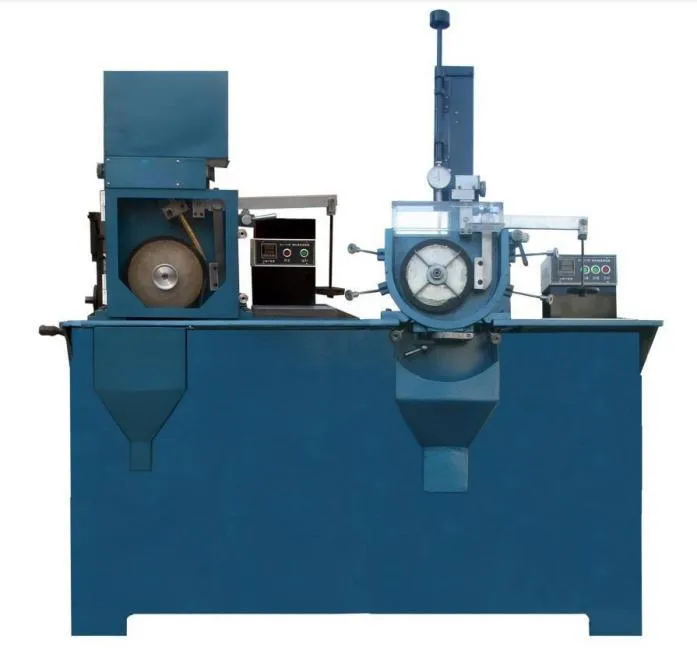
The Abrasive Wear Testing Machine is primarily used to simulate the wear process caused by hard particles or hard asperities moving across a solid surface under applied load. It is widely used to evaluate the abrasive wear resistance of metallic materials, coatings, lubricants, stone materials, and other specimens. To ensure the accuracy and reliability of test data as well as the safe operation of the equipment, operators should strictly follow the standardized procedures below.
1. Pre-Test Preparation
Environmental and Equipment Inspection
Ensure that the testing machine is installed on a level and stable surface, and adjust the anti-vibration leveling feet to keep the machine properly level.
Check that the power connection is correct and that the protective grounding is reliable.
Clean the main shaft, specimen fixtures, and contact surfaces of the tribological pair. Remove any rust-preventive oil, dust, or other contaminants, and ensure that no oil or debris enters the electrical control cabinet.
If a computer-based data acquisition system is provided, start the control software in advance and check the sensor connections and communication status.
Specimen Preparation and Installation
Prepare the specimens according to the applicable testing standard and ensure that their dimensional accuracy meets the specified requirements.
Clean, dry, and weigh the specimens to record their initial mass. For tests requiring measurement of three-dimensional material loss, it is recommended to use a 3D scanner to obtain surface point-cloud data before testing.
Install the upper specimen: Place the specimen in the corresponding fixture, insert the tapered shank upward into the tapered hole of the main shaft, and rotate the upper pull rod clockwise to secure it.
Install the lower specimen or abrasive container: Depending on the test configuration, such as pin-on-disk, four-ball, or slurry abrasive wear testing, install the lower tribological pair or add the abrasive medium with the specified particle size and concentration.
2. Parameter Setting and Preheating
System Preheating
Turn on the main power supply and activate the control system.
Start the oil pump or drive motor and allow the machine to run under no load for 10–15 minutes so that the hydraulic system or mechanical transmission components reach a stable operating condition.
Check that the rotational direction of the main shaft is correct. Normally, when viewed from above, the shaft should rotate clockwise. Proceed only after confirming the correct direction.
Parameter Presetting
Set the required test parameters on the control panel or software interface, including:
Test force / applied load
Main shaft rotational speed
Test duration
Maximum friction torque alarm value
For tests involving high- or low-temperature environments, set the required temperature target and activate the temperature control system. Allow the temperature to stabilize before applying the test load.
3. Test Procedure
Clearance Adjustment and Zeroing
Adjust the height of the lower guide shaft so that a small clearance of approximately 1–2 mm is maintained between the upper and lower specimens.
Perform the zeroing operation for the test-force sensor and friction-force sensor to eliminate the effects of dead weight and initial stress.
Loading and Test Start
Click the “Load” button. The system will automatically apply the test force at the preset loading rate until the specified load is reached.
Confirm once again that the friction-force reading is zero, then click “Start.” The main shaft will begin rotating, the timer will start, and the data acquisition system will simultaneously record real-time parameters such as friction torque, temperature, and rotational speed.
Test Monitoring
During the test, the operator should closely monitor the operating condition of the equipment and check for any abnormal noise, excessive vibration, or unusually rapid temperature rise.
Do not open the protective cover or touch any moving components while the test is in progress. If an abnormal condition occurs, immediately press the “Emergency Stop” or “Pause” button.
4. Test Completion and Data Processing
Unloading and Shutdown
When the preset test duration or number of cycles is reached, the machine will automatically stop.
Click the “Unload” button to automatically release the test force to zero.
Do not begin dismantling the specimens until the main shaft has come to a complete stop.
Specimen Removal and Post-Test Treatment
Release the locking mechanism and carefully remove the upper and lower specimens.
Clean abrasive particles and wear debris from the specimen surfaces and dry the specimens to a constant mass.
Weigh the specimens after testing and calculate the mass loss. Alternatively, use a 3D scanner or industrial camera to compare the surface morphology before and after testing and quantify volume loss or dimensional changes.
Data Storage and Equipment Maintenance
Save the raw test data, coefficient of friction–time curve, and temperature–time curve in the software, and generate the test report.
Shut down the computer and main power supply.
Clean the equipment and apply rust-preventive oil to components susceptible to corrosion. Cover the machine with a protective dust cover when not in use.
5. Precautions
Safety First: First-time operators must perform the test under the supervision of experienced personnel. Overloading the equipment is strictly prohibited.
Standardized Operation: Strictly follow the procedures specified in the equipment operating manual. In particular, use the designated tools when installing or removing tribological pairs to avoid damaging precision bearings or sensors.
Regular Calibration: The test force and friction torque should be calibrated regularly using standard weights and dedicated calibration tools to ensure measurement accuracy.
Environmental Control: Maintain appropriate laboratory temperature and humidity conditions and minimize external vibration to prevent interference with test accuracy.
By strictly following the above operating procedures, the scientific validity, accuracy, and repeatability of abrasive wear testing can be effectively ensured, providing a reliable basis for evaluating the wear resistance of materials.
The Abrasive Wear Testing Machine plays an important role across a wide range of industrial applications:
1. Agricultural and Construction Machinery
It is used to evaluate the service life and abrasive wear resistance of components such as plowshares, excavator bucket teeth, and crusher liners under soil, sand, and gravel conditions. The test results help guide the selection and improvement of wear-resistant materials such as high-manganese steel and high-chromium cast iron.
2. Materials Research and Surface Treatment
The tester is used to investigate the wear mechanisms of new alloys, ceramics, engineering plastics, and hardfacing coatings. By comparing wear data from specimens subjected to different heat treatment and surface treatment processes, such as carburizing, nitriding, and laser cladding, researchers can optimize surface treatment technologies and improve material wear resistance.
3. Quality Control and Product Development
In the manufacturing of refractory materials, fly-ash sand-lime brick molds, and automotive components, the tester can be used for batch-to-batch quality consistency testing. It helps verify whether products meet specified abrasive wear resistance requirements and provides supporting data for product development and performance optimization.
The core importance of the Abrasive Wear Testing Machine lies in its ability to simulate real abrasive operating conditions in a controlled manner and accurately reveal the wear mechanisms and service-life limits of materials. It provides essential scientific data for material selection, process optimization, reliability design, and product performance evaluation.
1. Reproduction of Operating Conditions and Failure Prediction
By precisely controlling parameters such as abrasive particle size, hardness, applied load, and movement trajectory, the tester can closely reproduce the cutting and plowing effects encountered in harsh environments such as mining and construction machinery applications. This helps identify potential design defects and early failure risks before products are put into service.
2. Wear Mechanism Analysis and Microscopic Traceability
Combined with wear scar morphology and wear debris analysis, the tester can help distinguish abrasive wear from other wear mechanisms, such as fatigue wear and corrosive wear. It provides insight into material removal mechanisms at the microscopic level, supporting the development of appropriate surface modification and substrate strengthening strategies.
3. Material Selection and Process Verification
The tester can establish an objective ranking of the wear resistance of different materials or coatings under standardized test conditions. It also provides quantitative verification of the actual effectiveness of processes such as heat treatment, hardfacing, and thermal spraying in improving abrasive wear resistance, reducing the risk of incorrect conclusions based solely on experience.
4. Service-Life Prediction and Maintenance Planning
By using accelerated wear tests to determine wear progression patterns, the tester provides supporting data for remaining service-life assessment of critical components. This helps manufacturers develop scientifically based preventive maintenance schedules and reduce costs associated with unexpected equipment downtime.
In summary, the Abrasive Wear Testing Machine is not only a key instrument for evaluating material wear resistance, but also an important technical tool for accelerating new material development, extending the service life of mechanical equipment, and conserving energy and resources. With continued technological advancement, its testing accuracy and application range are expected to expand further, providing more reliable and comprehensive data support for industrial manufacturing.